MISC: Tips & Tricks


# RANDOM LINUX TIPS & TRICKS


# Get INFO/VERSION

# Raspberry PI model / revision / serial

  1. $ cat /proc/device-tree/model
  1. $ cat /proc/cpuinfo

# SN#:

  1. $ cat /proc/cpuinfo | grep Serial | cut -d ' ' -f 2

# 10000000XXXXXXXX


  1. $ cat /proc/asound/version
  1. $ dpkg -l alsa*

# Kernel version

  1. $ uname -a

# fedora update kernel/system

  1. $ dnf -y update && dnf -y upgrade

# For example, to add the user linuxize to the sudo group you would run the following command:

  1. $ sudo usermod -a -G sudo linuxize

# Configure to boot into Raspbian Desktop

  1. $ sudo raspi-config

# use your arrow keys to navigate to Enable Boot to Desktop and press enter. Select the Desktop login option and press enter.

# Configure to boot into Raspbian Desktop (without raspi-config)

  1. $ sudo update-rc.d lightdm disable

# Raspberry testing repository

# replace buster by testing in /etc/apt/sources.list

  1. $ sudo nano /etc/apt/sources.list

# # from
# deb http://raspbian.raspberrypi.org/raspbian/ buster main contrib non-free rpi
# # to
# deb http://raspbian.raspberrypi.org/raspbian/ bullseye main contrib non-free rpi

  1. $ sudo apt update

# check if process is locked

  1. $ ps aux | grep -i apt

# kill process (replace pid_id by the process ID number)

  1. $ sudo kill pid_id

# check if killed

  1. $ sudo kill -9 pid_id

# Disable DEBIAN 10 GUI:

  1. $ sudo systemctl set-default multi-user.target
  1. $ sudo reboot

To re-enable the GUI:

  1. $ sudo systemctl set-default graphical.target
  1. $ sudo reboot

# activate raspberry pi WIFI

  1. $ sudo raspi-config

# Select “Localisation Options” then select “change WLAN country”

# then enter root

  1. $ sudo su

# generate wpa_passphrase using your SSID and followed by typing the wifi password
# replace YOUR-SSID by the exact name of your wifi network name

  1. $ wpa_passphrase "YOUR-SSID" >> /etc/wpa_supplicant/wpa_supplicant.conf

# check if the configuration is okay

  1. $ sudo nano /etc/wpa_supplicant/wpa_supplicant.conf

# should contain something like this:
# the country= must contains a 2 letters ISO 3166-1 of your country code

  1. ctrl_interface=DIR=/var/run/wpa_supplicant GROUP=netdev
  2. update_config=1
  3. country=GB
  4. # reading passphrase from stdin
  5. network={
  6. ssid="YOUR-SSID"
  7. psk=47abc8153891372573fc831a0bab0346b07cb900ada28dc52686359cc60ab9e7
  8. }

# network IP info

  1. $ ifconfig

# scan wifi network

  1. $ sudo iwlist wlan0 scan

# power OFF / ON HDMI raspberry pi

# hdmi OFF

  1. $ sudo /opt/vc/bin/tvservice -o

# hdmi ON

  1. $ sudo /opt/vc/bin/tvservice -p

# AMD64 Useful Cmds

# get hostname

  1. $ hostnamectl

# set hostname

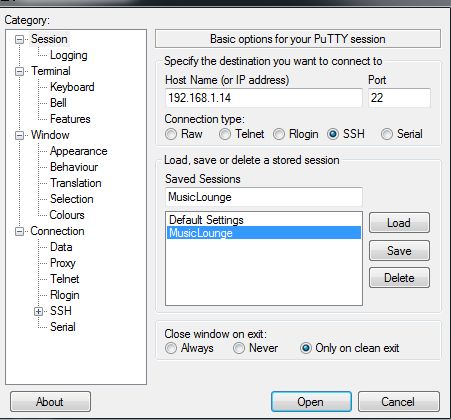
  1. $ sudo hostnamectl set-hostname musiclounge
  1. $ sudo nano /etc/hosts

127.0.0.1 localhost
127.0.1.1 musiclounge

# The following lines are desirable for IPv6 capable hosts
::1 localhost ip6-localhost ip6-loopback
ff02::1 ip6-allnodes
ff02::2 ip6-allrouters

  1. $ sudo reboot

# Check your current Ethernet connection speed

# install ethtool utility

  1. $ sudo apt-get install ethtool

# determine the name of your ethernet interface usually eth0 or enp3s0

  1. $ ip a

# get the speed

  1. $ sudo ethtool eth0 | grep -i speed

# get current playback info useful to check if current playback is DSD native (DSD_U32_BE)

  1. $ cat /proc/asound/card*/pcm*p/sub*/hw_params

# in case you have to entry commands from the server console and not from remote PC/SSH session
# you may want to change the keyboard layout
# use the followinf cmd on debian

  1. sudo dpkg-reconfigure keyboard-configuration

TROUBLESHOOTING: Static IP


# TS7

# Static IP not working
# assign IP to eth0 interface

# configure a static IP address by adding the following to /etc/dhcpcd.conf:

  1. $  ip link show

# ON RASPBERRY PI

  1. 1: lo:  mtu 65536 qdisc noqueue state UNKNOWN mode DEFAULT group default qlen 1000
  2. 2: eth0:  mtu 1500 qdisc pfifo_fast state UP mode DEFAULT group default qlen 1000
  3. 3: wlan0:  mtu 1500 qdisc noop state DOWN mode DEFAULT group default qlen 1000

# eth0 is your default interface (Ethernet connection), do not use wifi for your audio server

# ON AMD64 PC

  1. 1: lo:  mtu 65536 qdisc noqueue state UNKNOWN mode DEFAULT group default qlen 1000
  2. 2: enp3s0:  mtu 1500 qdisc pfifo_fast state UP mode DEFAULT group default qlen 1000
  3. 3: wlp2s0:  mtu 1500 qdisc noop state DOWN mode DEFAULT group default qlen 1000

# enp3s0 is your default interface (Ethernet connection), do not use wifi for your audio server

# type:

  1. $ sudo nano /etc/network/interfaces

# add those lines at end:

  1. auto lo eth0
  2. iface lo inet loopback
  3.  
  4. iface eth0 inet static
  5.     address 192.168.x.x
  6.     netmask 255.255.255.0
  7.     network 192.168.x.x
  8.     gateway 192.168.x.x

# CTRL+O to save
# CTRL+X to exit

  1. $ sudo nano /etc/resolv.conf

# add one or 2 lines (change IP to your DNS address or your router)

  1. nameserver 192.168.x.x
  2. nameserver x.x.x.x

# CTRL+O to save
# CTRL+X to exit

  1. $ sudo reboot

# OPTIONAL AND NOT RECOMMENDED
# stop dhcpcd service when the static ip is valid and reachable only

  1. $ sudo systemctl stop dhcpcd

# restart network

  1. $ sudo systemctl restart networking

# get the status (you may lose your ssh session see below)

  1. $ sudo systemctl status networking

# if everything okay reboot your system

  1. $ sudo reboot

# or type this cmd below with interface name (eth0 or enp3s0 ) and reboot manually

  1. $ sudo ifdown enp3s0

# here you’re loosing your SSH session obviously
# see troubbleshooting if static IP not working
# reboot system
# and start the NEW SSH SESSION WITH YOUR NEW STATIC IP! đŸ˜‰

DHCP vs Static IP


# OPTIONAL STATIC IP

# identify your ethernet card name usualy eth0 or enp3s0

  1. $ ip link show

# A DHCP CONFIG IS PERFECTLY VALID for building your Audophile Server,
#
# DHCP Reservation service (included in your netbox/router) provides an IP address to a specific client based on it’s physical MAC address.
# the device will always get the same IP address and it will never change as soon as you do not replace your Ethernet card.

# check /etc/network/interfaces and add the following DHCP entries if missing

  1. $ sudo nano /etc/network/interfaces

# if your eternet card is eth0

auto eth0
iface eth0 inet dhcp

# or if it’s enp3s0 (amd64 Gigabyte Brix)

auto enp3s0
iface enp3s0 inet dhcp

# or if it’s enp2s0 (amd64 Intel NUC)

auto enp2s0
iface enp2s0 inet dhcp

# CTRL+O to save
# CTRL+X to exit

# or if netplan is used (Ubuntu 22.04 amd64) you can make a generic config
# to match any Ethernet adapter

  1. $ sudo nano /etc/netplan/00-installer-config.yaml
network:
  ethernets:
    eth:
      match:
        name: en*
      dhcp4: true
  version: 2

# CTRL+X then Y to save

# for amd64 check dmesg in case of error type:

  1. sudo dmesg
... firmware: failed to load i915/glk_dmc_ver1_04.bin (-2)

# install the realtek firmware and reboot
# add the non free repo to sources list

  1. sudo nano /etc/apt/sources.list

# add these lines

deb http://deb.debian.org/debian bullseye-backports main contrib non-free
deb-src http://deb.debian.org/debian bullseye-backports main contrib non-free

# update pkgs

  1. $ sudo apt update

# install firmware

  1. $ sudo apt install firmware-realtek
  2. $ sudo apt install firmware-misc-nonfree
  3. $ sudo reboot

# open your router dhcp setting and “reserve” the IP address of your audio server
# to skip the STATIC IP tutorial below
# go to the bottom page and click the NEXT POST button


Static IP Address - Click To Read More...
# identify your ethernet card name usualy eth0 or enp3s0

# WIFI IS NOT RECOMMENDED, remove your wifi card from your device

# and configure a static IP address in /etc/dhcpcd.conf:


# Static IP on Raspberry PI 4


  1. $ ip link show
1: lo: <LOOPBACK,UP,LOWER_UP> mtu 65536 qdisc noqueue state UNKNOWN mode DEFAULT group default qlen 1000
2: eth0: <BROADCAST,MULTICAST,UP,LOWER_UP> mtu 1500 qdisc pfifo_fast state UP mode DEFAULT group default qlen 1000
3: wlan0: <BROADCAST,MULTICAST> mtu 1500 qdisc noop state DOWN mode DEFAULT group default qlen 1000

# eth0 is your default interface (Ethernet connection), do not use wifi for your audio server

# if eth0 is NOT VISIBLE then pass net.ifnames=0 to the kernel cmd by adding this at the beginning of /boot/cmdline.txt and reboot

  1. $ sudo nano /boot/cmdline.txt


# save
CTRL+X then Y then ENTER

  1. $ sudo reboot

# to configure statis ip address

  1. $ sudo nano /etc/network/interfaces

# add the following lines at end (remove dhcp lines):

auto eth0
iface eth0 inet static
address 192.168.x.x
netmask 255.255.255.0
network 192.168.x.x
gateway 192.168.x.x

# example:

auto eth0
iface eth0 inet static
address 192.168.1.75
netmask 255.255.255.0
network 192.168.1.0
gateway 192.168.1.1


# Static IP on amd64 (Intel NUC, Mini PC,…)


# ON AMD64 PC

  1. $ ip link show
1: lo: <LOOPBACK,UP,LOWER_UP> mtu 65536 qdisc noqueue state UNKNOWN mode DEFAULT group default qlen 1000
2: enp3s0: <BROADCAST,MULTICAST,UP,LOWER_UP> mtu 1500 qdisc pfifo_fast state UP mode DEFAULT group default qlen 1000
3: wlp2s0: <BROADCAST,MULTICAST> mtu 1500 qdisc noop state DOWN mode DEFAULT group default qlen 1000

# enp3s0 is your default interface (Ethernet connection), do not use wifi for your audio server

  1. $ sudo nano /etc/network/interfaces

# add the following lines at end:

auto enp3s0
iface enp3s0 inet static
address 192.168.x.x
netmask 255.255.255.0
network 192.168.x.x
gateway 192.168.x.x

# address = the choosen static IP address, EXAMPLE: 192.168.1.20
# network = your IPs range, EXAMPLE: 192.168.1.0
# gateway/router = your internet box LAN IP, EXAMPLe: 192.168.1.1

# CTRL+O to save
# CTRL+X to exit


  1. $ sudo systemctl restart networking


# get the status

  1. $ sudo systemctl status networking


# if everything okay reboot your system

  1. $ sudo reboot


# or type this cmd below with interface name (eth0 or enp3s0 ) and reboot manually

  1. $ sudo ifdown enp3s0


# here you’re loosing your SSH session obviously

# see troubleshooting page if static IP not working

# reboot system

# and start the NEW SSH SESSION WITH YOUR NEW STATIC IP! đŸ˜‰


# STEP6
# to continue open SSH session with this time your new static IP address this time

# (click yes and accept the new certificate)

  1. $ login pi

Click the button NEXT below to continue…

SSH Session


# STEP3

# Now you have the IP assigned to your device, you need to start a ssh session from your (remote) PC,
# this is required to enter the commands and update/install all packages

# putty.exe utility is recommended on Windows, obviously Terminal app will be used on Linux and MacOS:
https://www.chiark.greenend.org.uk/~sgtatham/putty/latest.html

# on other OS, use SSH app or Terminal with ssh pi@192.168.x.x

# click yes and accept the fingerprint key the first time you connect to audio server

# For Linux noob the $ prefix in all commands on this website must NOT be copied, the ‘$’ prefix symbolizes the prompt


# Start the SSH session on Raspberry PI

  1. $ login pi

# use the password of user pi your created during the installation,
# ‘raspberry’ is the password by default of the Raspberry PI device

# all basic steps done! now you have the prompt:

  1. pi@raspberrypi:~ $

# to change your password
# (password of our MusicLounge Audiophile distribution is musiclounge )

  1. $ passwd

# START on other distro with only root user,
# we recommend to add a user “pi” (or other name) to mach all our tutorials
# if you use a minimal Ubuntu/Debian distro for Odroid or other boards

# we strongly suggest to read carefully the tutorial to prepare your linux distro before going further

Prepare Your Minimal (light) Linux Distro
https://linuxaudiofoundation.org/misc-preparing-a-minimal-linux-distro-odriod-c2-example/


#
# Congrats! your linux distro is ready, an ssh session is pending
# and the user pi has been created

# add user to sudoers after installation
# enter root
# use ‘exit’ to leave root and back to PI user session

  1. $ su - root
  1. # nano /etc/sudoers

# or

  1. $ sudo nano /etc/sudoers

# add the line below after root ALL=(ALL:ALL) ALL

  1. user ALL=(ALL:ALL) ALL

# where <user> is your username (Ie. pi ALL=(ALL:ALL) ALL)

# save
CTRL+X then Y then ENTER
# create at least Downloads and scripts directories if they do not exist

  1. $ mkdir Downloads
  2. $ mkdir scripts

# ready to start!


# STEP4

# intial configuration, change the default hostname

# skip this step if you already configure the hostname musiclounge during the installation process

# if you intend to create a multi-rooms audiophile configuration sharing the same music library on your LAN network
# do not forget to change the hostname to avoid conflict between each audio server (see the corresponding tutorial)
# we suggest a name including ml for musiclounge followed by the room name (e.g mlbedroom, mllivingroom, mlkitchen,…)

# check your current settings

  1. hostnamectl

# and change it to musiclounge if needed


# on Raspberry PI 4 type:

  1. $ sudo raspi-config

# 0 network options: hostname choose replace raspberrypi by musiclounge for example
# 1 setup localisation choose with SPACE bar en US UTF8 only
# 2 expand SDCARD partition (Advanced Options/Expand)


# on Odroid C4 (Armbian arm64)
# launch armbian-config to make the same changes on ARM based device like on the Odroid C2 or C4

  1. $ sudo armbian-config

# to change the hostname manually

  1. sudo hostnamectl set-hostname musiclounge

# check the hostname

  1. hostnamectl

# check /etc/hostname entry

  1. $ sudo nano /etc/hostname
musiclounge

# check /etc/hosts entry

  1. $ sudo nano /etc/hosts
127.0.0.1       localhost
127.0.1.1       musiclounge

# The following lines are desirable for IPv6 capable hosts
::1     localhost ip6-localhost ip6-loopback
ff02::1 ip6-allnodes
ff02::2 ip6-allrouters


# Optional sanity check

  1. sudo apt update
  2. sudo apt upgrade -y

# reboot the system

  1. sudo reboot

# restart a SSH session

  1. $ login pi

Click the button NEXT below to continue…

IP Of The Server


# STEP2

# get the IP of your audio server

# This is your first boot!
# but before building your audio server you need the IP assigned by your router (integrated dhcp server ) to your device

# in case of error or no IP found, check the DHCP vs Static IP tutorial to
# configure correctly your network interface and go back to this page, here

# try to ping the server (ping musiclounge),
# open terminal or commands prompt and type:

# if the command return an IP v6 address add the param -4 like

c:\>ping musiclounge -4

# you can scan your NETWORK to get the IP address of your audio server if needed
# from any tools or router settings or whatever, internet is your friend
# tools like those ones:

# from linux

  1. $ nmap -sP 192.168.x.x/24

# from macos (type “brew install nmap” if cmd not found)

  1. $ nmap -sP 192.168.x.x/24

# from windows cmd prompt
# C:\Windows\System32>arp -a

# double check by using ping cmd:
# ping 192.168.x.x

# or if you have keyboard/monitor connected to your rPI, login and type:

  1. $ ifconfig

# eth0 entry should contain the IP address

Click the button NEXT below to continue…