# preparing your linux distro
# before following our tutorials and build your audiophile server
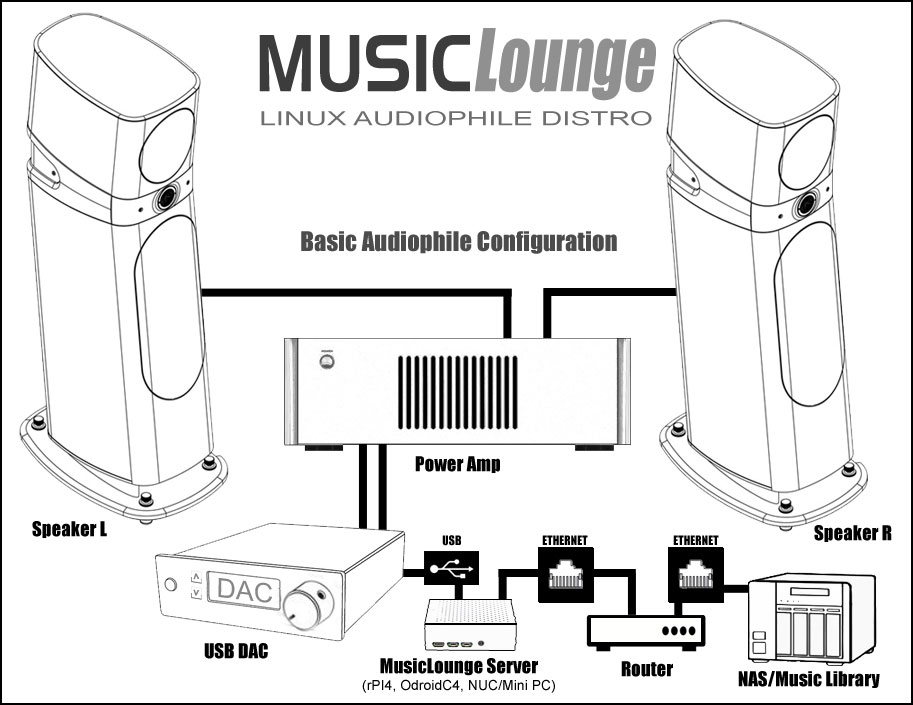
# our ready to use audiophile server distribution image disk (MusicLounge) is available here
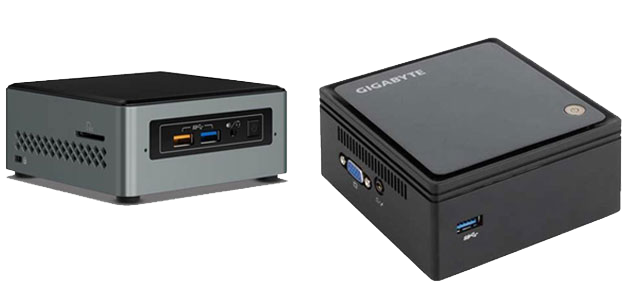
# all info below are applicable to Odroid and others boards like raspberry PI or barebone PC
# beware official Odroid Linux Kernel version (v3.16.85) is outdated and do not contains the Native DSD patch
# you need version 4.19.64 or greater to play native DSD,
# however selecting DOP MPD audio output will works with limitation
# To build the MusicLounge Audiophile Server we recommended:
# Armbian Focal or Jammy Linux Distro on Odroid C4,
# RaspiOS lite (Debian) bookworm for Raspberry PI 5 or PI 4,
# latest stable Debian Standard or Ubuntu server for amd64 (buster or bullseye or bookworm)
# MPD version 0.23.15 and 0.22.8 for old distribution
# myMPD version 15.02 and 10.7.1 for old distribution
# before building you audiophile server the software requirements are simple:
# pi user must be set
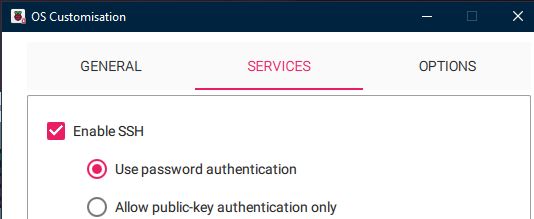
# ssh must be set
# alsa must be installed and should recognize your usb dac (command: aplay -l )
# get the img from repository (armbian, raspberry, debian)
# burn it on SDCARD (8GB is enough) with any tool like Win32DiskImager app on Windows
# connect your usb DAC
# boot
# and start the ssh session
# default login/pass:
# on odroid: root/odroid or root/1234
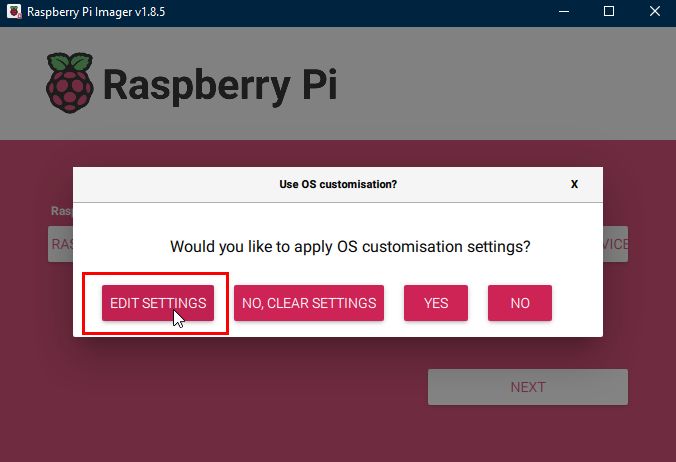
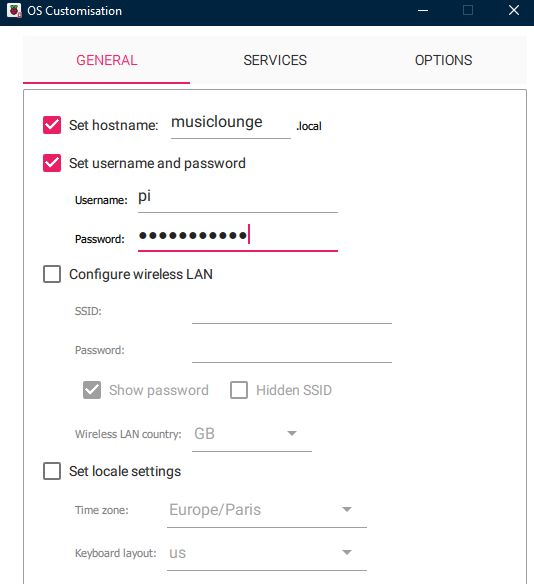
# on raspberry PI: pi/raspberry (see the Raspberry PI Imager for latest OS)
# on amd64 Debian: root password is created during the installation
# on our MusicLounge distro: pi/musiclounge
# the root password needed to be changed immediately
# and a new user (non root) must be created (see below)
New root password: ************************
Repeat password: ************************

Choose default system command shell:

1) bash
2) zsh

Shell: BASH

Creating a new user account. Press  to abort

Please provide a username (eg. your forename): pi
Create password: ************************
Repeat password: ************************

Please provide your real name: Pi

Dear Pi, your account pi has been created and is sudo enabled.
Please use this account for your daily work from now on.
# sanity check
$ sudo apt update -y
$ sudo apt upgrade -y
# on armbian ssh is available by default
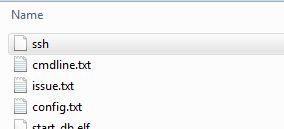
# on RaspiOS you need to add an empty file named ssh inside the sdcard before booting the OS
# on Ubuntu server amd64 SSH is activated during installation
# on Debian Standard amd64 you need to install openssh-server pkg
# on Debian netinstall you need to install sudo and pi to sudo group
~# su - root~# apt install sudo~# usermod -aG sudo pi
# after the first boot add user pi to sudoers on Debian
$ su - root$ nano /etc/sudoers
# find line root ALL=(ALL:ALL) ALL and add this line
pi ALL=(ALL:ALL) ALL
# save
# CTRL+X then type y and enter
# go back to user
exit
# install ssh server
# not needed on debian netinstall distro as you normally install SSH server during the installation process
$ sudo apt install openssh-server -y
# active service
$ sudo systemctl start ssh
$ sudo systemctl enable ssh
# HEADLESS PC Server (boot without monitor on)
# BEWARE: if you install a distro supposed to work with GUI like Ubuntu/Debian
# and EVEN IF YOU DID NOT INSTALL A USER INTERFACE you may not be able to boot without a monitor!
# fortunately we can fix it by changed a few lines in grub bootloader to get our headless audio server
# edit grub conf
$ sudo nano /etc/default/grub
# and modify the parameters of GRUB_CMDLINE_LINUX_DEFAULT and GRUB_CMDLINE_LINUX to
GRUB_CMDLINE_LINUX_DEFAULT=""
GRUB_CMDLINE_LINUX="text"
# and obviously uncomment this line
GRUB_TERMINAL=console
# SAVE
# CTRL+X then type y and ENTER key
# now update grub
$ sudo update-grub
that’s it!
# optional: if bash auto-completion (automatically completing of file names, commands and more) is not installed by default
$ sudo apt-get install bash-completion
# audio check
# plug your usb DAC and type the cmd below to list soundcard, your dac must be in the list:
$ aplay -l
# alsa should be already installed (not in ubuntu server no soundcard driver by default)
# if your dac is not visible, install ALSA:
$ sudo apt-get install alsa-utils alsa-tools libasound2
# list devices to see if your DAC is recognized
$ aplay -l
root@odroid:~# aplay -l
**** List of PLAYBACK Hardware Devices ****
card 0: ODROIDHDMI [ODROID-HDMI], device 0: I2S dit-hifi-0 []
  Subdevices: 1/1
  Subdevice #0: subdevice #0
card 1: D90 [D90], device 0: USB Audio [USB Audio]
  Subdevices: 1/1
  Subdevice #0: subdevice #0
# your usb DAC should be visible in the list
# if still it’s not visible (no soundcard error)
# list installed alsa pkgs, remove them and reinstall alsa
#
# alsa-base pkg could be omited if not present in repository
”
$ sudo dpkg -l alsa*
$ sudo apt --purge remove alsa-base alsa-firmware-loaders alsa-oss alsa-source alsa-tools alsa-tools-gui alsa-topology-conf alsa-ucm-conf alsamixergui alsa-utils
$ sudo apt-get install alsa-base alsa-utils alsa-tools libasound2
$ sudo reboot
# check alsa status
$ sudo systemctl status alsa-utils.service
# if alsa service is masked unmask it
$ sudo rm /lib/systemd/system/alsa-utils.service
$ sudo systemctl daemon-reload
$ sudo systemctl enable alsa-utils
$ sudo systemctl start alsa-utils
# check the status again everything should be okay
$ sudo systemctl status alsa-utils.service
# on a minimal linux distro with only root you need to create a new user ‘pi’ (or other name) which going to be used to build your MusicLounge audiophile server
# if you’re already login as pi user skip the creation below and go to adding groups directly
# create a user pi:
$ adduser pi
root@odroid:~# adduser pi
Adding user `pi' ...
Adding new group `pi' (1000) ...
Adding new user `pi' (1000) with group `pi' ...
Creating home directory `/home/pi' ...
Copying files from `/etc/skel' ...
Enter new UNIX password:
Retype new UNIX password:
passwd: password updated successfully
Changing the user information for pi
Enter the new value, or press ENTER for the default
        Full Name []: PI
        Room Number []:
        Work Phone []:
        Home Phone []:
        Other []:
Is the information correct? [Y/n] y
# add new user to all default groups
$ sudo usermod -aG adm,dialout,cdrom,sudo,audio,www-data,video,plugdev,games,users,input,netdev pi
# for Raspberry PI add gpio i2c spi
$ sudo usermod -aG adm,dialout,cdrom,sudo,audio,www-data,video,plugdev,games,users,input,render,netdev,gpio,i2c,spi pi
$ groups pi
# reboot, login pi (skip this step if you are already logged in as pi user)
$ sudo reboot
login as: pi pi@192.168.1.11's password: ___ _ _ _ ____ _ _ / _ \ __| |_ __ ___ (_) __| | / ___| || | | | | |/ _` | '__/ _ \| |/ _` | | | | || |_ | |_| | (_| | | | (_) | | (_| | | |___|__ _| \___/ \__,_|_| \___/|_|\__,_| \____| |_| Welcome to Armbian 21.05.2 Focal with Linux 5.10.34-meson64 System load: 45% Up time: 0 min Memory usage: 4% of 3.73G IP: 192.168.1.11 CPU temp: 42°C Usage of /: 10% of 14G RX today: 31.0 MiB [ 0 security updates available, 4 updates total: apt upgrade ] To run a command as administrator (user "root"), use "sudo". See "man sudo_root" for details. pi@odroidc4:~$
# your linux distro is now ready
# click the link below to follow our tutorials and build the MusicLounge Audiophile Server