TIDAL Connect Installation

For Raspberry PI 5 and PI 4 with bookworm OS and amd64 and odroid platform use an upnp client with Tidal plugin (see upnp renderer tutorial for more info)

# OPTIONAL: install Tidal Connect For Raspberry PI 4 with 32 Bit OS only,

# using your DAC to listen music from Tidal

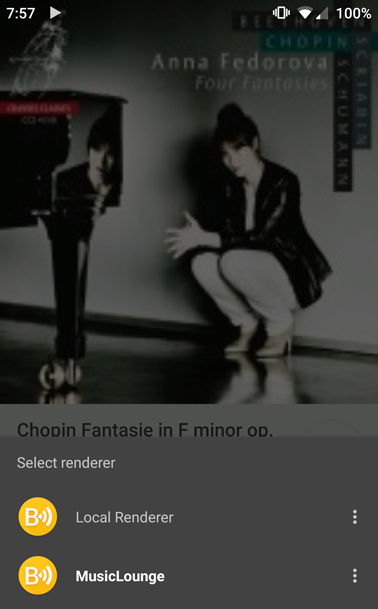
Tidal Connect is a service similar to Spotify Connect. Using the Tidal app to play a song you can easily click the device selector icon (top right) to select the Musiclounge Streamer audio server.

We are going to install it on MusicLounge Audio Server for Raspberry PI 4 as Tidal connect linux binary seems to be only available on arm 32bit (Raspberry PI). This installation is based on https://github.com/shawa github repo.


# if install pkg ends with error:
# “Failed to start The PHP 7.3 FastCGI Process Manager”
# type the cmd below to create the missing directory:

  1. $ sudo mkdir /var/run/php

# add stretch repo to sources list
# we need to temporary add it to install old libavformat.so.57

# add line:

deb http://archive.raspbian.org/raspbian stretch main
  1. $ sudo nano /etc/apt/sources.list

CTRL+X and y to save

# update pkgs list

  1. $ sudo apt update

# install dependencies

  1. $ sudo apt install -y libavformat57 libportaudio2* libflac++6v5*

# edit again /etc/apt/sources.list to disable (place # to comment) debian stretch repo after the installation of the libs

  1. $ sudo nano /etc/apt/sources.list
#deb http://archive.raspbian.org/raspbian stretch main

# CTRL+X and Y to Save


# install other dependencies

  1. $ sudo curl -k -O -L http://security.debian.org/debian-security/pool/updates/main/o/openssl/libssl1.0.0_1.0.1t-1+deb8u12_armhf.deb
  1. $ sudo apt install -y ./libssl1.0.0_1.0.1t-1+deb8u12_armhf.deb
  1. $ sudo curl -k -O -L http://security.debian.org/debian-security/pool/updates/main/c/curl/libcurl3_7.38.0-4+deb8u16_armhf.deb
  1. $ sudo apt install -y ./libcurl3_7.38.0-4+deb8u16_armhf.deb

# create working folder

  1. $ sudo mkdir /usr/ifi

# enter directory

  1. $ cd /usr/ifi

# clone git repo inside the directory

  1. $ sudo git clone https://github.com/shawaj/ifi-tidal-release

# fix file permissions

  1. $ sudo chmod +x /usr/ifi/ifi-tidal-release/play
  1. $ sudo chmod +x /usr/ifi/ifi-tidal-release/bin/tidal_connect_application
  1. $ sudo chmod +x /usr/ifi/ifi-tidal-release/pa_devs/run.sh

# deploy tidal service

  1. $ sudo ./ifi-tidal-release/file-deploy.sh

# get your device name

  1. $ aplay -l

# in this example the USB DAC detected is a Topping D90 MQA on card 1

card 0: Headphones [bcm2835 Headphones], device 0: bcm2835 Headphones [bcm2835 Headphones]
  Subdevices: 8/8
  Subdevice #0: subdevice #0
  Subdevice #1: subdevice #1
 ...
card 1: MQA [D90 MQA], device 0: USB Audio [USB Audio]
  Subdevices: 1/1
  Subdevice #0: subdevice #0

# edit the tidal connect service to update your device name

# change parameter -f and –model-name with Musiclounge Streamer
# if your DAC supports MQA set parameter –codec-mqa and –enable-mqa-passthrough to true
# and change (or add) parameter –playback-device with your USB DAC name followed by “: USB Audio (hw:x,0)”
# x corresponding to the card number: (hw:1,0) for card 1

  1. $ sudo nano /lib/systemd/system/ifi-streamer-tidal-connect.service
[Unit]
Description=RasPi Streamer Tidal Connect Service
[Service]
Restart=on-failure
ExecStart=/usr/ifi/ifi-tidal-release/bin/tidal_connect_application \
                                --tc-certificate-path "/usr/ifi/ifi-tidal-release/id_certificate/IfiAudio_ZenStream.dat" \
                                -f "Musiclounge Streamer" \
                                --codec-mpegh true \
                                --codec-mqa true \
                                --model-name "Musiclounge Streamer" \
                                --disable-app-security false \
                                --disable-web-security false \
                                --enable-mqa-passthrough true \
                                --log-level 3 \
                                --enable-websocket-log "0"
                                --playback-device "D90 MQA: USB Audio (hw:1,0)"

User=root
Group=root
RestartSec=1
KillMode=control-group
[Install]
WantedBy=multi-user.target

# CTRL+X and Y to Save


# start service and check on status

  1. $ sudo systemctl daemon-reload

# enable service at startup

  1. $ sudo systemctl enable ifi-streamer-tidal-connect.service

# start service

  1. $ sudo systemctl start ifi-streamer-tidal-connect.service

# Check the status

# the status is very important to check if the service is enabled and run correctly

# also useful to get the correct name of valid device(s)
# see the instructions above to change the –playback-device parameter

  1. $ sudo systemctl status ifi-streamer-tidal-connect.service

ROON Brigde / Server


# install official ROON brigde/server

  1. $ sudo apt-get update

# make sure curl is installed

  1. $ sudo apt install curl

# install dependency (ffmpeg lib)

  1. $ sudo apt-get install ffmpeg

# setup directory for installation

  1. $ sudo mkdir ~/Downloads/roon_server
  1. $ cd ~/Downloads/roon_server/

# Roon Server x86_64
# all instructions are available here:
# https://help.roonlabs.com/portal/en/kb/articles/linux-install#Easy_Installer
# download script from the website (see above link) or fetch it with curl

  1. $ sudo curl -LO https://download.roonlabs.com/builds/roonserver-installer-linuxx64.sh

# check the script before going further

  1. $ cat roonserver-installer-linuxx64.sh

# change permission

  1. $ sudo chmod +x roonserver-installer-linuxx64.sh

# install

  1. $ sudo ./roonserver-installer-linuxx64.sh

# Roon Bridge x86_64

  1. $ sudo curl -LO http://download.roonlabs.com/builds/roonbridge-installer-linuxx64.sh
  1. $ sudo chmod +x roonbridge-installer-linuxx64.sh
  1. $ sudo ./roonbridge-installer-linuxx64.sh

# Roon Bridge armv7hf (32 bit)

  1. $ sudo curl -LO http://download.roonlabs.com/builds/roonbridge-installer-linuxarmv7hf.sh
  1. $ sudo chmod +x roonbridge-installer-linuxarmv7hf.sh
  1. $ sudo ./roonbridge-installer-linuxarmv7hf.sh

# Roon Bridge armv8 (64 Bit)

  1. $ sudo curl -LO http://download.roonlabs.com/builds/roonbridge-installer-linuxarmv8.sh
  1. $ sudo chmod +x roonbridge-installer-linuxarmv8.sh
  1. $ sudo ./roonbridge-installer-linuxarmv8.sh

# roon is now activated, get the status
# roon server

  1. $ sudo systemctl status roonserver

# roon bridge

  1. $ sudo systemctl status roonbridge

# Log File Location
# If you used the easy installer, log files can be found in `/var/roon/RoonServer/Logs`, `/var/roon/RAATServer/Logs`, and `/var/roon/RoonBridge/Logs`.

# activate or deactivate service
# roon server

  1. $ sudo systemctl enable roonserver
  1. $ sudo systemctl disable roonserver

# roon bridge

  1. $ sudo systemctl enable roonbridge
  1. $ sudo systemctl disable roonbridge

# start, stop, status or restart service
# roon server

  1. $ sudo systemctl start roonserver
  1. $ sudo systemctl stop roonserver
  1. $ sudo systemctl restart roonserver
  1. $ sudo systemctl status roonserver

# roon bridge

  1. $ sudo systemctl start roonbridge
  1. $ sudo systemctl stop roonbridge
  1. $ sudo systemctl restart roonbridge
  1. $ sudo systemctl status roonbridge

# Uninstalling
# You can reverse the steps of the easy installer by running it with ‘uninstall’ as a command line parameter. For example:
# Roon Server x86_64

  1. $ sudo ~/Downloads/roonserver/roonserver-installer-linuxx64.sh uninstall

# Roon Bridge x86_64

  1. $ sudo ~/Downloads/roonserver/roonbridge-installer-linuxx64.sh uninstall

# Roon Bridge armv7hf (32 bit)

  1. $ sudo ~/Downloads/roonserver/roonbridge-installer-linuxarmv7hf.sh uninstall

# Roon Bridge armv8 (64 Bit)

  1. $ sudo ~/Downloads/roonserver/roonbridge-installer-linuxarmv8.sh uninstall

Squeezelite Player


# STEP21

# Add Squeezelite player (outdated emulation of squeezelitebox for using with LMS player)

# using your DAC to listen music from Logitech Media Server or any LMS media player

  1. $ sudo apt-get install squeezelite


# Edit conf. with 2 change only:

# type:

  1. $ sudo nano /etc/default/squeezelite


# SL_NAME="MusicLounge";

# SB_EXTRA_ARGS="-o plughw:1,0"

# CTRL+O to save
# CTRL+X to exit

# Activate:

  1. $ sudo systemctl restart squeezelite


# That's it!

# enable/disable service:

  1. $ sudo systemctl enable squeezelite-service


# or

  1. $ sudo systemctl disable squeezelite-service


  1. $ sudo reboot


# More info:
https://github.com/ralph-irving/squeezelite

https://www.mysqueezebox.com/

AirPlay Server


# STEP20

# Add Airplay server (16 bit 44.1 audio only)

# using your DAC to listen music from Apple devices

# We’re going to build the latest ShairportSync project which is the best implementation of airplay today

# building ShairportSync type these cmds:

# get dependencies:

  1. $ sudo apt-get install autoconf automake avahi-daemon build-essential git libasound2-dev libavahi-client-dev libconfig-dev libdaemon-dev libpopt-dev libssl-dev libtool xmltoman


# get source:

  1. $ cd ~/Downloads/
  1. $ git clone https://github.com/mikebrady/shairport-sync.git


# build (with alsa):

  1. $ cd shairport-sync


  1. $ autoreconf -i -f


  1. $ ./configure --with-alsa --with-avahi --with-ssl=openssl --with-systemd --with-metadata


# Make and install:

# make

  1. $ sudo make install


# Activate:

  1. $ sudo systemctl enable shairport-sync


# Edit conf. with 2 change only:

# type:

  1. $ sudo nano /etc/shairport-sync.conf


# in general section:

name = "MusicLounge";

# in alsa section:

output_device = "plughw:1,0"

# CTRL+O to save
# CTRL+X to exit

# Start:

  1. $ sudo service shairport-sync start

# That's it!


# on AMD64 (Debian 10 buster 64 Bit) if airplay service failed to start with error Failed to start Avahi mDNS/DNS-SD Stack
# then do the following

  1. $ sudo systemctl stop docker
  2. $ sudo systemctl stop docker.socket

# reinstall corrupted lib

  1. $ cd ~/Downloads

# download

  1. $ sudo wget http://ftp.de.debian.org/debian/pool/main/a/avahi/libavahi-core7_0.7-4+deb10u1_amd64.deb

# install:

  1. $ dpkg -i libavahi-core7_0.7-4+deb10u1_amd64.deb
  1. $ sudo apt reinstall avahi-daemon
  1. $ sudo reboot

# Mode info on shairport sync:
https://github.com/mikebrady/shairport-sync-for-openwrt

Spotify Connect (On amd64 Distro Using Docker)


# STEP 19bis

** SKIP THIS INSTALLATION IF RASPOTIFY IS ALREADY INSTALLED **

# run Spotify Connect Client on Intel/AMD 64 Bit (amd64 platform)

# Install latest version of Raspotify on amd64, arm64 and armhf is very easy
# type the following command:

$ sudo apt-get -y install curl && curl -sL https://dtcooper.github.io/raspotify/install.sh | sh

# #################################################################################
# Edit Raspotify configuration:
# #################################################################################

  1. $ sudo nano /etc/raspotify/conf
LIBRESPOT_DEVICE_NAME="MusicLounge"
LIBRESPOT_BITRATE="160"
LIBRESPOT_DEVICE="plughw:1,0"

# CTRL+O to save
# CTRL+X to exit

  1. $ sudo systemctl enable raspotify
  1. $ sudo systemctl start raspotify

# check the status

  1. $ sudo systemctl status raspotify

# Spotify Connect is now available!
# start a song, click the devices icon (bottom left) and choose MusicLounge.
# That’s it!

Read the instruction below to install an old version of Raspotify using docker.

# using Docker (librespot)
# More info available here:
https://github.com/dubo-dubon-duponey/docker-librespot

# ###################################################################################
# Beware Docker sub network can be in conflict with your LAN network configuration

# Install Docker

  1. $ sudo apt-get install apt-transport-https ca-certificates curl gnupg lsb-release


  1. $ curl -fsSL https://download.docker.com/linux/debian/gpg | sudo gpg --dearmor -o /usr/share/keyrings/docker-archive-keyring.gpg


  1. $ echo "deb [arch=amd64 signed-by=/usr/share/keyrings/docker-archive-keyring.gpg] https://download.docker.com/linux/debian $(lsb_release -cs) stable" | sudo tee /etc/apt/sources.list.d/docker.list > /dev/null


  1. $ sudo apt update


  1. $ sudo apt-get install docker-ce docker-ce-cli containerd.io

# check docker version installed

  1. $ apt-cache madison docker-ce


#check status (must be ACTIVE running )

  1. $ sudo systemctl status docker


# Install librespot container from
# https://github.com/dubo-dubon-duponey/docker-librespot

# download it

  1. $ sudo docker pull dubodubonduponey/librespot


# list all containers

  1. $ sudo docker images


# run librespot (as daemon) container name is spot with
# usb DAC device on card 1 (plughw:1,0 could be also hw:1,0 )
# Spotify Connect name is MusicLounge

$ sudo docker run -d --restart unless-stopped \
    --name "spot" \
    --env "NAME=MusicLounge" \
    --volume /tmp \
    --group-add audio \
    --device /dev/snd \
    --net host \
    --cap-drop ALL \
    --read-only \
    dubodubonduponey/librespot \
    --backend alsa \
    --device plughw:1,0 \
    --disable-audio-cache \
    --initial-volume=100

# Spotify Connect is now available!
# start a song, click the devices icon (bottom left) and choose MusicLounge Spotify Connect


# if MusicLounge is not visble on the Spotify connect devices list,
# stop the container and check the parameters before running again

# list of containers,

  1. $ sudo docker container ls

# if spot is in the list stop it

  1. $ sudo docker stop spot
  2. $ sudo docker rm spot

# then check your parameters and run it again (see the above command)


# librespot docker options

# -c, –cache CACHE Path to a directory where files will be cached.
# –disable-audio-cache
# Disable caching of the audio data.
# -n, –name NAME Device name
# –device-type DEVICE_TYPE
# Displayed device type
# -b, –bitrate BITRATE
# Bitrate (96, 160 or 320). Defaults to 160
# –onevent PROGRAM
# Run PROGRAM when playback is about to begin.
# –emit-sink-events
# Run program set by –onevent before sink is opened and after it is closed.
# -v, –verbose Enable verbose output
# -u, –username USERNAME
# Username to sign in with
# -p, –password PASSWORD
# Password
# –proxy PROXY HTTP proxy to use when connecting
# –ap-port AP_PORT
# Connect to AP with specified port. If no AP with that
# port are present fallback AP will be used. Available
# ports are usually 80, 443 and 4070
# –disable-discovery
# Disable discovery mode
# –backend BACKEND
# Audio backend to use. Use ‘?’ to list options
# –device DEVICE Audio device to use. Use ‘?’ to list options if using portaudio or alsa
# –mixer MIXER Mixer to use (alsa or softvol) -m,
# –mixer-name MIXER_NAME
# Alsa mixer name, e.g “PCM” or “Master”. Defaults to ‘PCM’
# –mixer-card MIXER_CARD
# Alsa mixer card, e.g “hw:0” or similar from `aplay -l`. Defaults to ‘default’
# –mixer-index MIXER_INDEX
# Alsa mixer index, Index of the cards mixer. Defaults to 0
# –mixer-linear-volume
# Disable alsa’s mapped volume scale (cubic). Default false
# –initial-volume VOLUME
# Initial volume in %, once connected (must be from 0 to 100)
# –zeroconf-port ZEROCONF_PORT
# The port the internal server advertised over zeroconf uses.
# –enable-volume-normalisation
# Play all tracks at the same volume
# –normalisation-pregain PREGAIN
# Pregain (dB) applied by volume normalisation
# –volume-ctrl VOLUME_CTRL
# Volume control type – [linear, log, fixed]. Default is logarithmic
# –autoplay autoplay similar songs when your music ends.
# –disable-gapless
# disable gapless playback.


# remove librespot container

# list of containers,

  1. $ sudo docker container ls

# if spot is in the list stop it

  1. $ sudo docker stop spot

# then list images

  1. $ sudo docker images

# get the IMAGE ID form the list and remove it

  1. $ sudo docker rmi IMAGE_ID

# remove docker
#list packages

  1. $ dpkg -l | grep -i docker


# remove

  1. $ sudo apt-get purge -y docker-ce docker-ce-cli docker-ce-rootless-extras docker-scan-plugin


# cleanup

  1. $ sudo apt-get autoremove -y --purge docker-ce docker-ce-cli docker-ce-rootless-extras docker-scan-plugin


Spotify Connect


# STEP19

# OPTIONAL: install Spotify Connect,

# using your DAC to listen music from Spotify

# More info on librespot
https://github.com/librespot-org/librespot

# More info on Spotify connect
https://support.spotify.com/us/article/spotify-connect/

# More info on Raspotify connect
https://dtcooper.github.io/raspotify/

# Install latest version of Raspotify on amd64, arm64 and armhf is very easy
# type the following command:

$ sudo apt-get -y install curl && curl -sL https://dtcooper.github.io/raspotify/install.sh | sh

# in case of error related to dependency like

curl : Depends: libcurl4 (= 7.74.0-1.3+deb11u7) but 7.88.1-1~bpo11+1 is to be installed

# install curl from backports

  1. $ sudo apt-get -t bullseye-backports install curl

# then install pkg

  1. $ sudo curl -sL https://dtcooper.github.io/raspotify/install.sh | sh

# #################################################################################
# Edit Raspotify configuration:
# #################################################################################

  1. $ sudo nano /etc/raspotify/conf
LIBRESPOT_NAME="MusicLounge"
LIBRESPOT_BITRATE="160"
LIBRESPOT_DEVICE="plughw:1,0"

# CTRL+O to save
# CTRL+X to exit

  1. $ sudo systemctl enable raspotify
  1. $ sudo systemctl start raspotify

# check the status

  1. $ sudo systemctl status raspotify

# Spotify Connect is now available!
# start a song, click the devices icon (bottom left) and choose MusicLounge.
# That’s it!

Click titles below to expand to install an old version of Raspotify.


amd64 platform like Intel NUC, Gigabyte BRIX, Mini-PC,... - Click To Read More

# #################################################################################
# DEBIAN/UBUNTU AMD64 PLATFORM
# #################################################################################

# SKIP THIS TUTO and go next tutorial to learn how to install Raspotify on amd64 using Docker


armhf platform like Raspberry PI 4 - Click To Read More

# #################################################################################
# ATTENTION Raspotify Pkg Is For 32Bit Linux Distro Only, armhf platform
# #################################################################################
#
# install librespot (Raspotify) on Raspberry PI 4 with RaspiOS armhf (32Bit) is easy:

# install curl

  1. $ sudo apt-get -y install curl apt-transport-https

# Add repo and its GPG key

  1. $ curl -sSL https://dtcooper.github.io/raspotify/key.asc | sudo apt-key add -v -
  1. $ echo 'deb https://dtcooper.github.io/raspotify raspotify main' | sudo tee /etc/apt/sources.list.d/raspotify.list

# Install pkg

  1. $ sudo apt-get update
  1. $ sudo apt-get -y install raspotify

# read below how to configure Raspotify


arm64 platform like Odroid C4 - Click To Read More


# #################################################################################
# on arm64 platform you can force installation of Raspotify 32 Bit pkg by using multi-arch
# applicable to Odroid C4 platform for example
# #################################################################################

# Force installation on Ubuntu arm64 (64Bit) using multi-arch

# add armhf platform

  1. $ sudo dpkg --add-architecture armhf

# check if added

  1. $ sudo dpkg --print-foreign-architectures
$ armhf

# update pkgs list

  1. $ sudo apt update

# Install curl and https apt transport

  1. $ sudo apt-get -y install curl apt-transport-https

# Add repo and its GPG key

  1. $ curl -sSL https://dtcooper.github.io/raspotify/key.asc | sudo apt-key add -v -
  1. $ echo 'deb https://dtcooper.github.io/raspotify raspotify main' | sudo tee /etc/apt/sources.list.d/raspotify.list

# edit sources list to target armhf platform

  1. $ sudo nano /etc/apt/sources.list.d/raspotify.list

# change

deb https...

# by

deb [arch=armhf] https...

# Install pkgs list

  1. $ sudo apt-get update
  1. $ sudo apt-get -y install raspotify:armhf

# if your /var/log/syslog is fulfilled by deprecated …cp15_barrier
# add the following to any startup script like the good old /etc/rc.local
# if you are not too lazy then create a service it is better…

  1. $ sudo nano /etc/rc.local

# add this line to deactivate the warning

sudo bash -c "echo 2 > /proc/sys/abi/cp15_barrier"

# CTRL+O to save
# CTRL+X to exit


# if for some reason this did not work on your Odroid C4 (arm64 platform) go next tutorial to install it with Docker
# to cleanup ALL previously installed armhf pkgs on arm64 platform

  1. $ sudo apt --purge remove "*:armhf"
  1. $ sudo apt autoremove
  1. $ sudo reboot


Raspotify configuration - Click To Read More

# #################################################################################
# Edit Raspotify configuration:
# #################################################################################

  1. $ sudo nano /etc/default/raspotify
DEVICE_NAME="MusicLounge"
BITRATE="160"
OPTIONS="--device plughw:1,0"

# CTRL+O to save
# CTRL+X to exit

  1. $ sudo systemctl restart raspotify

# check the status

  1. $ sudo systemctl status raspotify

# Spotify Connect is now available!
# start a song, click the devices icon (bottom left) and choose MusicLounge.
# That’s it!


UPNP Renderer (Local, Qobuz, Tidal And Others)


# STEP18

# OPTIONAL: Using your USB DAC as a UPnP Renderer (Control Point)

# UPnP renderer: music player like BubbleUpnp or UpnpPlay send the stream from local source
# or remote source like Qobuz or Tidal to your audiophile server using MusicLounge renderer

# install upmpdcli


# UBUNTU INSTALLATION

  1. $ sudo apt update
  1. $ sudo add-apt-repository ppa:jean-francois-dockes/upnpp1

# in case of error or the repository can’t be reached, install this pkg before

  1. $ sudo apt install software-properties-common
  2. $ sudo add-apt-repository ppa:jean-francois-dockes/upnpp1

# install

  1. $ sudo apt install upmpdcli

# DEBIAN INSTALLATION
# add the repository for Debian list available here:
# IMPORTANT: change ‘buster’ by ‘bullseyes’ to match your debian version
https://www.lesbonscomptes.com/upmpdcli/pages/downloads.html

  1. $ cd /etc/apt/sources.list.d/
  1. $ sudo wget https://www.lesbonscomptes.com/upmpdcli/pages/upmpdcli-bullseye.list

# update pkgs

  1. $ sudo apt update

# install repository key

  1. $ cd ~/Downloads
  1. $ gpg --no-default-keyring --keyring ./lesbonscomptes.gpg --keyserver pool.sks-keyservers.net --recv-key F8E3347256922A8AE767605B7808CE96D38B9201

# or fetch the key form website

  1. $ sudo wget https://www.lesbonscomptes.com/pages/lesbonscomptes.gpg

# copy lesbonscomptes.gpg to /usr/share/keyrings/

  1. $ sudo cp lesbonscomptes.gpg /usr/share/keyrings/
  1. $ sudo chmod 644 /usr/share/keyrings/lesbonscomptes.gpg

# update pkgs

  1. $ sudo apt update

# install

  1. $ sudo apt install upmpdcli

# RASPBERRY PI INSTALLATION
# add the repository for Debian bullseye list available here:
# IMPORTANT: change ‘buster’ by ‘bullseyes’ to match your debian version
https://www.lesbonscomptes.com/upmpdcli/pages/downloads.html

  1. $ cd /etc/apt/sources.list.d/
  1. $ sudo wget https://www.lesbonscomptes.com/upmpdcli/pages/upmpdcli-rbullseye.list

# update pkgs

  1. $ sudo apt update

# install repository key

  1. $ cd ~/Downloads
  1. $ gpg --no-default-keyring --keyring ./lesbonscomptes.gpg --keyserver pool.sks-keyservers.net --recv-key F8E3347256922A8AE767605B7808CE96D38B9201

# copy lesbonscomptes.gpg to /usr/share/keyrings/

  1. $ sudo cp lesbonscomptes.gpg /usr/share/keyrings/

# update pkgs

  1. $ sudo apt update

# install

  1. $ sudo apt install upmpdcli

# Edit configuration the server:

  1. $ sudo nano /etc/upmpdcli.conf

# uncomment and modify friendlyname and checkcontentformat
# upnpAV is deactivated here (upnpav = 0)
# and should be 1 if you intend to play videos which is not the main purpose of an high end audiophile system
# OpenHome is also supported by default

friendlyname = MusicLounge
upnpav = 0
checkcontentformat = 0

# CTRL+O to save
# CTRL+X to exit

# Start UPNP Renderer

  1. $ sudo systemctl enable upmpdcli
  2. $ sudo systemctl start upmpdcli

# status of the service:

  1. $ sudo systemctl status upmpdcli

# to stop the service (if needed) do the following:

  1. $ sudo systemctl stop upmpdcli

# install qobuz and tidal plugins if needed

  1. $ sudo apt install upmpdcli-qobuz
  1. $ sudo apt install upmpdcli-tidal

# edit /etc/upmpdcli.conf to add your credential by editing the configuration (sudo nano /etc/upmpdcli.conf)

Congrats! You listen the music stored on your phone on your audiophile system using a UpNp Client like BubbleUpnp


More info on UPMPDCLI Project:
https://www.lesbonscomptes.com/upmpdcli/index.html

DLNA Server


# STEP17

# OPTIONAL: Install a DLNA server (browse and stream the music very easily with your Upnp music player client )

# MiniDLNA Project:
https://sourceforge.net/projects/minidlna/

# Install DLNA server type:

  1. $ sudo apt install minidlna

# Edit configuration the server:

  1. $ sudo nano /etc/minidlna.conf
media_dir=A,/mnt/media
friendly_name=MusicLounge

# CTRL+O to save
# CTRL+X to exit

  1. $ sudo systemctl enable minidlna
  2. $ sudo systemctl start minidlna
  1. $ sudo systemctl status minidlna

# That’s it! you can now browse the music library with your Upnp music player like BubbleUpnp

# to check the status of the DLNA server open your net browser and type the ip address of the Raspberry followed by the dedicated port 8200:
# http://192.168.x.x:8200


TROUBLESHOOTING

# force update minidlna database

  1. $ sudo systemctl stop minidlna.service
  2. $ sudo systemd-run -t /usr/sbin/minidlnad -r -f /etc/minidlna.conf
  3. $ sudo systemctl restart minidlna.service

# you can monitor DLNA database update
# “Finished parsing playlists” means it’s completed

  1. $ sudo tail -f /var/log/minidlna/minidlna.log

# check the minidlna log

  1. $ sudo cat /var/log/minidlna/minidlna.log

# in case of error:

WARNING: Inotify max_user_watches [16384] is low or close to the number of used watches [2] and I do not have permission to increase this limit.

# edit /etc/sysctl.conf to change the limit

  1. $ sudo nano /etc/sysctl.conf

# add these lines

fs.inotify.max_user_instances=8192
fs.inotify.max_user_watches=524288

#
# check the status of minidlna service

  1. $ sudo systemctl status minidlna

# in case of error related to autofs

/lib/systemd/system/minidlna.service:4: Failed to add dependency on autofs, ignoring: Invalid argument

# edit service to apply this fix

  1. $ sudo nano /lib/systemd/system/minidlna.service

# and replace autofs by autofs.service
# CTRL + X and Y to SAVE

  1. $ sudo systemctl daemon-reload
  2. $ sudo systemctl restart minidlna

Enable IR Remote Control Wake Up On USB Port

# read this tutorial if you cannot wake up (resume) your Barebone PC with your IR remote control after entering standby mode (suspend)
# do the following to enable wake up on USB port where your IR remote control receiver (USB IR Blaster) is connected
# check the usb port used by your receiver

  1. $ lsusb -t
pi@medialounge:~$ lsusb -t
/:  Bus 02.Port 1: Dev 1, Class=root_hub, Driver=xhci_hcd/1p, 5000M
/:  Bus 01.Port 1: Dev 1, Class=root_hub, Driver=xhci_hcd/6p, 480M
    |__ Port 1: Dev 6, If 1, Class=Human Interface Device, Driver=usbhid, 12M
    |__ Port 1: Dev 6, If 0, Class=Vendor Specific Class, Driver=mceusb, 12M
    |__ Port 3: Dev 3, If 0, Class=Audio, Driver=snd-usb-audio, 480M

# mceusb is on Bus 1 Port 1 (1-1)
# to confirm the USB port, get the Product ID of the receiver

  1. $ lsusb
pi@medialounge:~$  lsusb
Bus 002 Device 001: ID 1d6b:0003 Linux Foundation 3.0 root hub
Bus 001 Device 004: ID 046d:c52b Logitech, Inc. Unifying Receiver
Bus 001 Device 003: ID 152a:8750 Thesycon Systemsoftware & Consulting GmbH D90 MQA
Bus 001 Device 009: ID 147a:e03e Formosa Industrial Computing, Inc. Infrared Receiver [IR605A/Q]
Bus 001 Device 001: ID 1d6b:0002 Linux Foundation 2.0 root hub

# Infrared Receiver Product ID is e03e

# then get the port your receiver is plugged in:

  1. $ grep e03e /sys/bus/usb/devices/*/idProduct
/sys/bus/usb/devices/1-1/idProduct:e03e

# 1-1 confirm the Bus 1 and Port 1
# now check if wake up is enabled for this device

  1. $ cat /sys/bus/usb/devices/1-1/power/wakeup
disabled

# it is disabled, enable wake up on this port

$ sudo sh -c 'echo "enabled" > /sys/bus/usb/devices/1-1/power/wakeup'

# check again

  1. $ cat /sys/bus/usb/devices/1-1/power/wakeup
enabled

# create a systemd entry to make it permanent
# store the script in /usr/local/bin

  1. $ sudo nano /usr/local/bin/ir-remote-wakeup.sh

# add the command to enable wakeup

#!/usr/bin/bash
# enable wake up on IR remote control using USB bus 1 port 1
echo enabled > /sys/bus/usb/devices/1-1/power/wakeup

# CTRL+X and Y to SAVE

  1. $ sudo chmod +x /usr/local/bin/ir-remote-wakeup.sh

#
# now create a systemd service to make it permanent

  1. $ sudo nano /lib/systemd/system/ir-remote-wakeup.service
# enable wake up ir remote conrol on bus 1 port 1
[Unit]
Description=wakeup ir remote on bus 1 port 1 see ir-remote-wakeup.sh from /usr/local/bin/ for more info

[Service]
ExecStart=/usr/local/bin/ir-remote-wakeup.sh

[Install]
WantedBy=multi-user.target

# enable service

  1. $ sudo systemctl daemon-reload
  2. $ sudo systemctl enable ir-remote-wakeup.service
  3. $ sudo systemctl start ir-remote-wakeup.service

#
# on suspend mode your IR remote control can now wake up the barebone PC


# to allow sleep (suspend) but disallow hibernation
# edit

  1. $ sudo nano /etc/systemd/logind.conf
[Sleep]
AllowSuspend=yes
AllowHibernation=no
AllowSuspendThenHibernate=no

# disable ASPM in bios may help if your PCIe hardware cannot on wake up from sleep
# check if the PC wake up normaly if this still not working change the ASPM policy
# check it with:

  1. $ cat /sys/module/pcie_aspm/parameters/policy

# should be set to [performance]

[default] performance powersave powersupersave

# if performance is not set add
# pcie_aspm=force pcie_aspm.policy=performance cmds
# to grub GRUB_CMDLINE_LINUX_DEFAULT

  1. $ sudo nano /etc/default/grub

# add the cmds, save and update grub

  1. $ sudo update-grub
  1. $ sudo reboot

# check again with

  1. $ cat /sys/module/pcie_aspm/parameters/policy
default [performance] powersave powersupersave

Add LIRC Service (Odroid IR Remote Ctrl)


# ###############################################################################
# if Triggerhappy RC service has been previously installed
# it may not be necessary to install Lirc

# ###############################################################################

# STEP 16bis

# OPTIONAL: Remote Control Management with LIRC

# the previous tutorial on remote management by the very easy to use TriggerHappy did not make you happy? so you want a deep control of your RC? read the following…

# Using the integrated IR sensor of the Odroid board to drive your music library with a remote control is possible
# We are going to install a remote control management using LIRC (Linux Infrared Remote Control )

# for the example we use a very common Remote Control using the standard MCE (Media Center Remote Control) format
# reference Remote Control is XPC-RC01 or RC6 Media Center

# do not plug the USB IR sensor included with the remote control, in this example we do not need it as we use the IR sensor integrated on Odroid board
# more info on LIRC is available here: https://lirc.org/

# a snapshot of lirc remotes is available for download here:
# download it, extract it and browse remote images to find the closest one
https://sourceforge.net/p/lirc-remotes/code/ci/master/tree/remotes/


# install LIRC

# Armbian for Odroid boards includes a wizard for LIRC installation,
# launch armbian-config and select Network > Install IR

  1. $ sudo armbian-config

# to install it manually

  1. $ sudo apt-get install lirc

# modify the driver

  1. $ sudo nano /etc/lirc/lirc_options.conf
[lircd]
nodaemon        = False
driver          = default
device          = /dev/lirc0
output          = /var/run/lirc/lircd
pidfile         = /var/run/lirc/lircd.pid
plugindir       = /usr/lib/aarch64-linux-gnu/lirc/plugins
#plugindir = /usr/lib/x86_64-linux-gnu/lirc/plugins/
permission      = 666
allow-simulate  = No
repeat-max      = 600

[lircmd]
uinput          = False
nodaemon        = False

[modinit]
code = /sbin/modprobe meson-ir
#code = /sbin/modprobe  lirc_serial

[lircd-uinput]
# add-release-events = True
# release-timeout    = 50
# release-suffix     = _EVUP

# modify the default remote control configuration file
# this one is based on Remote Control ShuttleX conf (PN31) available here
# http://lirc.sourceforge.net/remotes/shuttle/PN31
# Remote Control DB is available here:
# https://sourceforge.net/p/lirc-remotes/code/ci/master/tree/remotes/

# create the remote config file

  1. $ sudo nano /etc/lirc/lircd.conf.d/myremote.lircd.conf
# copy the configuration
#
# this config file was automatically generated
# using WinLIRC 0.6.5 (LIRC 0.6.1pre3) on Mon Aug 25 22:24:07 2003
#
# contributed by lirc @ trollmaster.net
#
# brand:        made in china
# model:        XPC-RC01 based on PN31 from ShuttleX
# supported devices: 
#

begin remote

  name  CNRemote
  bits            9
  flags SPACE_ENC
  eps            40
  aeps          100

  header       3021  1469
  one           310   266
  zero          310   780
  ptrail        310
  post_data_bits  8
  post_data      0xFC
  gap          12038
  toggle_bit      0


      begin codes
          KEY_POWER                0x000000000000017B
          KEY_TV                   0x00000000000001BB
          print                    0x000000000000013B
          KEY_EXIT                 0x00000000000001DB
          KEY_AUDIO                0x000000000000015B
          KEY_IMAGES               0x000000000000019B
          KEY_VIDEO                0x000000000000011B
          KEY_MENU                 0x00000000000001EB
          KEY_BACK                 0x000000000000014B
          KEY_R                    0x000000000000018B
          KEY_OK                   0x0000000000000177
          KEY_PREVIOUS             0x000000000000016B
          KEY_PLAYPAUSE            0x00000000000001AB
          KEY_NEXT                 0x000000000000012B
          KEY_REWIND               0x0000000000000167
          KEY_STOP                 0x00000000000001B7
          KEY_FASTFORWARD          0x000000000000016F
          KEY_VOLUMEUP             0x00000000000001A7
          KEY_VOLUMEDOWN           0x0000000000000127
          KEY_INFO                 0x0000000000000137
          KEY_CHANNELUP            0x00000000000001AF
          KEY_CHANNELDOWN          0x000000000000012F
          KEY_MUTE                 0x00000000000001C7
          KEY_RECORD               0x00000000000001D7
          KEY_BACKSPACE            0x00000000000001CF
          KEY_1                    0x0000000000000147
          KEY_2                    0x0000000000000157
          KEY_3                    0x000000000000014F
          KEY_4                    0x0000000000000187
          KEY_5                    0x0000000000000197
          KEY_6                    0x000000000000018F
          KEY_7                    0x0000000000000107
          KEY_8                    0x0000000000000117
          KEY_9                    0x000000000000010F
          KEY_DOT                  0x00000000000001FB
          KEY_0                    0x00000000000001E7
          KEY_L                    0x00000000000001F7
          KEY_UP                   0x00000000000001B3
          KEY_DOWN                 0x000000000000011F
          KEY_LEFT                 0x00000000000001EF
          KEY_RIGHT                0x00000000000001BF
      end codes

end remote

# CTRL+O to save
# CTRL+X to exit

# change the default remote control buttons configuration to drive MPD with irexec a special daemon included with LIRC

  1. $ sudo nano /etc/lirc/irexec.lircrc
begin
 prog = irexec
 button = KEY_PLAY
 config = mpc play >/dev/null
 flags = quit
end

begin
 prog = irexec
 button = KEY_STOP
 config = mpc stop >/dev/null
 flags = quit
end

begin
 prog = irexec
 button = KEY_PAUSE
 config = mpc pause >/dev/null
 flags = quit
end

begin
 prog = irexec
 button = KEY_PLAYPAUSE
 config = mpc toggle >/dev/null
 flags = quit
end

begin
 prog = irexec
 button = KEY_NEXT
 config = mpc next >/dev/null
 flags = quit
end

begin
 prog = irexec
 button = KEY_PREVIOUS
 config = mpc prev >/dev/null
 flags = quit
end

begin
 prog = irexec
 button = KEY_FASTFORWARD
 config = mpc seek +10 >/dev/null
 flags = quit
end

begin
 prog = irexec
 button = KEY_FORWARD
 config = mpc seek +10 >/dev/null
 flags = quit
end


begin
 prog = irexec
 button = KEY_REWIND
 config = mpc seek -10 >/dev/null
 flags = quit
end

begin
 prog = irexec
 button = KEY_3
 config = /home/pi/scripts/./playlist3.sh >/dev/null
 flags = quit
end

begin
 prog = irexec
 button = KEY_1
 config = /home/pi/scripts/./playlist1.sh >/dev/null
 flags = quit
end

begin
 prog = irexec
 button = KEY_2
 config = /home/pi/scripts/./playlist2.sh >/dev/null
 flags = quit
end

begin
 prog = irexec
 button = KEY_6
 config = /home/pi/scripts/./lowbass.sh >/dev/null
 flags = quit
end

begin
 prog = irexec
 button = KEY_9
 config = /home/pi/scripts/./jbleq.sh >/dev/null
 flags = quit
end

begin
 prog = irexec
 button = KEY_0
 config = mpc enable only 1 && mpc play >/dev/null
 flags = quit
end

# CTRL+O to save
# CTRL+X to exit

# create a symbolic link to match any version of irexec

  1. $ sudo ln -s /etc/lirc/irexec.lircrc /etc/lirc/lircrc

# we can already enable LIRC service and run irexec manually to catch remote control button and drive MPD
# but it’s better to modify the irexec service to start it at boot

  1. $ sudo nano /lib/systemd/system/irexec.service
[Unit]
Documentation=man:irexec(1)
Documentation=http://lirc.org/html/configure.html
Documentation=http://lirc.org/html/configure.html#lircrc_format
Description=Handle events from IR remotes decoded by lircd(8)
After=network.target
Wants=lircd.service

[Service]
Type=simple
ExecStart=/usr/bin/irexec /etc/lirc/irexec.lircrc
Restart=on-failure
SuccessExitStatus=3 4
RestartForceExitStatus=3 4

[Install]
WantedBy=multi-user.target

# CTRL+O to save
# CTRL+X to exit

# activate LIRC and IREXEC service

  1. $ sudo systemctl daemon-reload
  1. $ sudo systemctl enable lircd
  2. $ sudo systemctl start lircd
  1. $ sudo systemctl enable irexec
  2. $ sudo systemctl start irexec
  3. $ sudo systemctl status irexec

# be sure to stop lircd uinput service to not inject key events to kernel

  1. $ sudo systemctl stop lircd-uinput.service
  2. $ sudo systemctl disable lircd-uinput.service
  3.  
  4. $ sudo systemctl status lircd-uinput.service

# reboot and chek the status

  1. $ sudo reboot
  2.  
  3. $ sudo systemctl status lircd

# both services are now activated, enabled and running at startup

# if your remote control do not send the correct key use the dump function to
# identify the correct key and change your cmds in /etc/lirc/irexec.lircrc (see above)

# To dump all events received through your remote control (useful to get the corresponding keys):

  1. $ irw

# CTRL+C to exit

# Run your MPD Client (MALP Android for example) play an album
# use your remote control to stop, play, go next, prev,…

# Congrats! Your MCE Remote controls the Music Player Daemon!

Click the button NEXT below to continue…